all things DBA has moved to
==> http://alllinuxdba.wordpress.com <==
woensdag 26 november 2014
zondag 23 november 2014
Installation of YAD on OUL 6.6
YAD on OUL 6.6
Recently I stumbled upon YAD (Yet Another Dialog) which is an improved version of Zenity. It has some major benefits compared to Zenity when you want to spice up your shell-scripts.
When trying to install it on OUL 6.6 I found out that the package was not available from the OracleYum repository so it has to be built it from source.
When trying to install it on OUL 6.6 I found out that the package was not available from the OracleYum repository so it has to be built it from source.
Extract the tar-file
[root@racnode1 ~]# tar xvf yad-0.24.0.tar.xz
yad-0.24.0/
yad-0.24.0/README
yad-0.24.0/missing
yad-0.24.0/COPYING
yad-0.24.0/TODO
yad-0.24.0/
yad-0.24.0/README
yad-0.24.0/missing
yad-0.24.0/COPYING
yad-0.24.0/TODO
Before installing yad you need to install 2 packages which are not installed in the basic-server installation from OUL.
- intltool.noarch
root@racnode1:~/yad-0.24.0 [root@racnode1 yad-0.24.0]# yum install intltool.noarch
Loaded plugins: security
Setting up Install Process
Resolving Dependencies
--> Running transaction check
...
---> Package libart_lgpl.x86_64 0:2.3.20-5.1.el6 will be installed
--> Finished Dependency Resolution
...
Installed:
intltool.noarch 0:0.41.0-1.1.el6
Dependency Installed:
autoconf.noarch 0:2.63-5.1.el6 automake.noarch 0:1.11.1-4.el6
gettext-devel.x86_64 0:0.17-18.el6 gettext-libs.x86_64 0:0.17-18.el6
libart_lgpl.x86_64 0:2.3.20-5.1.el6 libgcj.x86_64 0:4.4.7-11.el6
Complete!
- gtk2-devel.x86_64
root@racnode1 yad-0.24.0]# yum install gtk2-devel.x86_64
Loaded plugins: security Setting up Install Process Resolving Dependencies --> Running transaction check ---> Package gtk2-devel.x86_64 0:2.24.23-6.el6 will be installed ...
Installed: gtk2-devel.x86_64 0:2.24.23-6.el6
Dependency Installed:
atk-devel.x86_64 0:1.30.0-1.el6
cairo-devel.x86_64 0:1.8.8-3.1.el6
fontconfig-devel.x86_64 0:2.8.0-5.el6
freetype-devel.x86_64 0:2.3.11-14.el6_3.1
gdk-pixbuf2-devel.x86_64 0:2.24.1-5.el6
glib2-devel.x86_64 0:2.28.8-4.el6
libX11-devel.x86_64 0:1.6.0-2.2.el6
libXau-devel.x86_64 0:1.0.6-4.el6
libXcomposite-devel.x86_64 0:0.4.3-4.el6
libXcursor-devel.x86_64 0:1.1.14-2.1.el6
libXext-devel.x86_64 0:1.3.2-2.1.el6
libXfixes-devel.x86_64 0:5.0.1-2.1.el6
libXft-devel.x86_64 0:2.3.1-2.el6
libXi-devel.x86_64 0:1.7.2-2.2.el6
libXinerama-devel.x86_64 0:1.1.3-2.1.el6
libXrandr-devel.x86_64 0:1.4.1-2.1.el6
libXrender-devel.x86_64 0:0.9.8-2.1.el6
libpng-devel.x86_64 2:1.2.49-1.el6_2
libxcb-devel.x86_64 0:1.9.1-2.el6
pango-devel.x86_64 0:1.28.1-10.0.1.el6
pixman-devel.x86_64 0:0.32.4-4.el6
xorg-x11-proto-devel.noarch 0:7.7-9.el6
zlib-devel.x86_64 0:1.2.3-29.el6
Complete!
Now we can run ./configure and ./make and ./make install
[root@racnode1 yad-0.24.0]# ./configure
checking for a BSD-compatible install... /usr/bin/install -c
checking whether build environment is sane... yes
checking for a thread-safe mkdir -p... /bin/mkdir -p
checking for gawk... gawk
checking whether make sets $(MAKE)... yes
checking whether make supports nested variables... yes
checking whether to enable maintainer-specific portions of Makefiles... no
checking whether NLS is requested... yes
checking for style of include used by make... GNU
checking for gcc... gcc
checking whether the C compiler works... yes
...
config.status: creating config.h
config.status: executing depfiles commands
config.status: executing default-1 commands
config.status: executing po/stamp-it commands
Build icon browser - no
[root@racnode1 yad-0.24.0]# make
make all-recursive
make[1]: Entering directory `/root/yad-0.24.0'
Making all in src
make[2]: Entering directory `/root/yad-0.24.0/src'
CC yad-about.o
CC yad-calendar.o
CC yad-color.o
CC yad-dnd.o
CC yad-entry.o
CC yad-file.o
CC yad-font.o
...
make[2]: Entering directory `/root/yad-0.24.0'
make[2]: Leaving directory `/root/yad-0.24.0'
make[1]: Leaving directory `/root/yad-0.24.0'
[root@racnode1 yad-0.24.0]# make install
Making install in src
make[1]: Entering directory `/root/yad-0.24.0/src'
make[2]: Entering directory `/root/yad-0.24.0/src'
/bin/mkdir -p '/usr/local/bin'
/usr/bin/install -c yad '/usr/local/bin'
make[2]: Nothing to be done for `install-data-am'.
make[2]: Leaving directory `/root/yad-0.24.0/src'
make[1]: Leaving directory `/root/yad-0.24.0/src'
Making install in po
make[1]: Entering directory `/root/yad-0.24.0/po'
linguas="de fr it pt_BR ru sk uk zh_TW "; \
for lang in $linguas; do \
dir=/usr/local/share/locale/$lang/LC_MESSAGES; \
/bin/sh /root/yad-0.24.0/install-sh -d $dir; \
if test -r $lang.gmo; then \
/usr/bin/install -c -m 644 $lang.gmo $dir/yad.mo; \
echo "installing $lang.gmo as $dir/yad.mo"; \
else \
/usr/bin/install -c -m 644 ./$lang.gmo $dir/yad.mo; \
echo "installing ./$lang.gmo as" \
"$dir/yad.mo"; \
fi; \
if test -r $lang.gmo.m; then \
/usr/bin/install -c -m 644 $lang.gmo.m $dir/yad.mo.m; \
echo "installing $lang.gmo.m as $dir/yad.mo.m"; \
else \
if test -r ./$lang.gmo.m ; then \
/usr/bin/install -c -m 644 ./$lang.gmo.m \
$dir/yad.mo.m; \
echo "installing ./$lang.gmo.m as" \
"$dir/yad.mo.m"; \
else \
true; \
fi; \
fi; \
done
installing de.gmo as /usr/local/share/locale/de/LC_MESSAGES/yad.mo
installing fr.gmo as /usr/local/share/locale/fr/LC_MESSAGES/yad.mo
...
make[2]: Leaving directory `/root/yad-0.24.0'
make[1]: Leaving directory `/root/yad-0.24.0'
[root@racnode1 yad-0.24.0]#
[root@racnode1 ]# export DISPLAY=123.123.123.123:0.0
[root@racnode1 ]#./yad --color
Normally you should see a window pop up like below.

Installation of Oracle Unbreakable Linux 6.6 on Virtual Box
Installation of Oracle Unbreakable Linux 6.6 on Virtual Box
Intro
This installation has been performed on VirtualBox 4.3.16 running on Win 7. Make sure that you have downloaded the OUL-iso from the Oracle Software Delivery Cloud prior to the installation .
Create a vm in VirtualBox
Open VirutalBox and select Machine => New

Next give the vm a meaningfull name. This can be different from the actual hostname of the vm. Make sure that Type is Linux and Version is Oracle (64bit).

Assing memory to the vm.

Select "Create a virtual hard drive now" and click Create.

Select VDI as file type and on the next screen select "Fixed Size"


Select 12G for the virtual hard drive and click Create.

The virtual hard drive will be created. This can take up several minuts depending on the hardware.

Now that the virtual machine is created we need to add a virtual cd/dvd. Right click on the vm and select settings.

Click on the "Add CD/DVD Device icon right of "Controller IDE " and select the iso downloaded from Oracle.


You can now start up the vm. The OUL installer will start up. Select "Install or upgrade an existing system"

Click "Next"

Select "English" and click "Next"

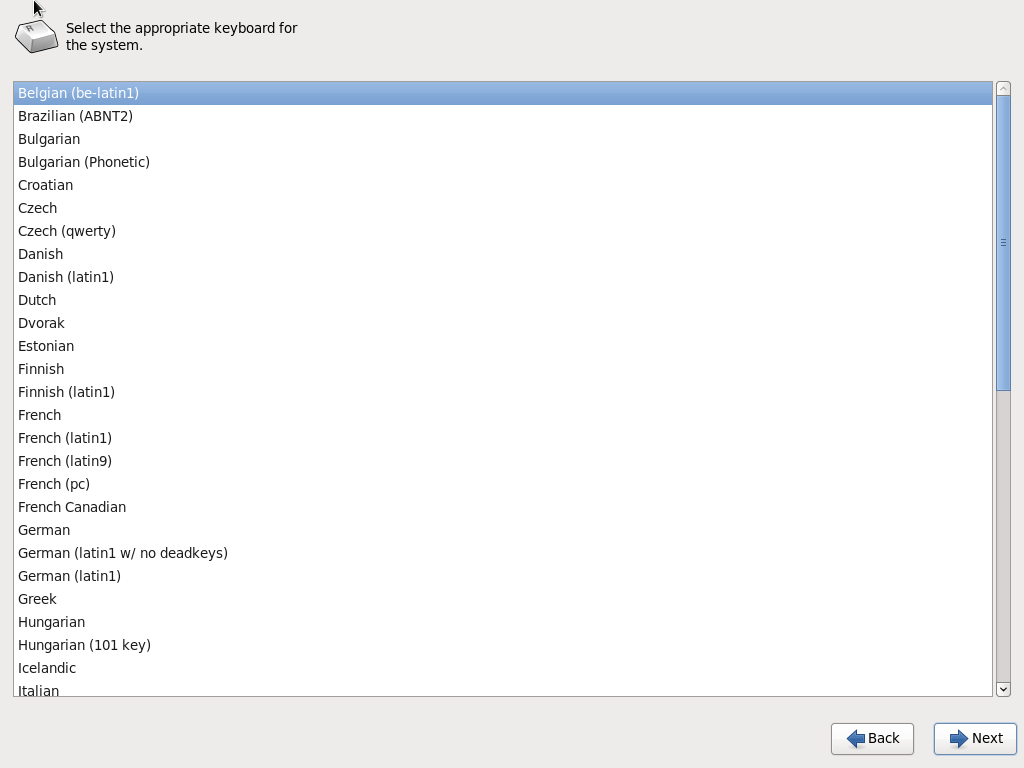
Select the appropriate keyboard-layout. I chose "Belgian BE Latin". Click "Next"
Select "Basic Storage Device" and click "Next"

Select "Yes, Discard any data" ==> Next


Select the correct timezone and click "Next"

Enter the password for the root-account.


Select "Write changes to disk" ==> "Next"


vrijdag 7 november 2014
"ORA-29024: Certificate validation failure" when calling https-site with utl_http
Problem when using UTL_HTTP for HTTPS-sites
When using the UTL_HTTP-package for accessing https-sites you might get the errorORA-29024: Certificate validation failure – message
SQL> select utl_http.request ('https://www.ssllabs.com/ssltest');
select utl_http.request ('https://www.ssllabs.com/ssltest') from dual
*
ERROR at line 1:
ORA-29273: HTTP request failed
ORA-06512: at "SYS.UTL_HTTP", line 1722
ORA-29024: Certificate validation failure
ORA-06512: at line 1
To avoid this you need to configure an Oracle Wallet :
Retrieve the certificate from the site. In Chrome click on the lock-icon :

A popup-screen will appear. Click on the Connection-tab and then on ‘Certificate information’

On the certificate-screen select the Details-tab and click on the ‘Copy to File…’ button

The ‘Certificate Export Wizard’ will start up. Click ‘Next’

Select ‘Cryptographic Message Syntax .. – PKCS #7’. The format might depend on the site you are accessing.

Select where to store the certificate and click ‘Next’.


Copy the certificate-file to the server hosting the Oracle database.
Next we need to create a wallet :
orapki wallet create -wallet /u01/app/oracle/admin/DB1/wallet -pwd Password -auto_login
and add the certificate to the wallet :
oracle [ /u01/app/oracle/admin/DB1/wallet ]$ orapki wallet add -wallet /u01/app/oracle/admin/DB1/wallet -trusted_cert -cert /tmp/ssllabs.p7b -pwd Password
Oracle PKI Tool : Version 11.2.0.3.0 - Production
Copyright (c) 2004, 2011, Oracle and/or its affiliates. All rights reserved.
oracle [ /u01/app/oracle/admin/DB1/wallet ]$
Now we can test if the we can access the site :
SQL> select utl_http.request ('https://www.ssllabs.com/ssltest',NULL,'file:/u01/app/oracle/admin/DB1/wallet','Password') from dual;
<!DOCTYPE html PUBLIC "-//W3C//DTD XHTML 1.0 Transitional//EN"
"http://www.w3.org/TR/xhtml1/DTD/xhtml1-transitional.dtd">
<html>
<head>
<title>Qualys SSL Labs - Projects / SSL Server Test</title>
…
SQL>
And it works :-)
Abonneren op:
Posts (Atom)